

Seed Saving for the Home Gardener
Seed Saving for the Home Gardener
by Ida Livingston of Davis City, IA
This past year a phenomenon occurred I had not heard of before that brought me mixed feelings. In the face of the nationwide quarantines and shelter in place mandates, people everywhere put out gardens. People who had not gardened before, those who had not in many years, and the regular gardeners did even more. This resulted in seed companies everywhere running out of seed relatively early in the year. Many of these companies had surplus stock that was completely wiped out. You can read about their experiences in this years’ catalogs in the introductory letter at the beginning of the catalogs. And then it happened again this year.
As I said this brought me mixed feelings. The first was “Wow! This is great, more people are gardening than ever!” The next thought was a little more somber and perhaps selfish, “I may not be able to count on getting the seed I want when I want it.”
This sparked in me some motivation to do what I should be doing anyway – saving my own seeds. Last fall I pulled out all the stops and saved seed with reckless abandon. There are jars now with probably 10 years’ worth of seed in each of them. Looking across at them I see 3 types of tomato seed, 2 peppers, a cucumber, a watermelon, cantaloupe, zucchini, butternut squash, okra, green beans, and my favorite annual flowers to boot.
Back in 2007, a pen pal in Missouri introduced me to raising seed for Baker Creek Heirloom Seed Company. Before that time, it had not even entered my head where all that seed in those pretty little packets came from. Curious and interested, I followed up on the contact information and began raising seed for them as well. I knew how to garden, but previously saving seed meant squirting some tomato seed on a napkin and letting it dry. Don’t get me wrong, this works, but it won’t get you that pretty clean seed in the packet. Not that it matters in a home garden.
There are some things that do matter though, like isolation distances, genetic variety, the ripeness of seed and more. Though technically you can breed new varieties and create your own hybrids, I am going to stick to basic seed saving from open pollinated varieties and maintaining a practical perspective on keeping the seed pure and true to type.
Understanding Isolation Distances
Isolation distances are key to maintaining genetic purity. It is the space required between cultivars that can mix. It is essential, should you be growing seed for a seed company, to give this strict observance. But when saving seeds only for myself I take more liberties. Considering the fact that peppers need a 500-foot minimum isolation distance per variety, and then looking at the land at my disposal and how many varieties of peppers I want to grow, my own peppers do not always get 500 feet between the varieties.
Ideal isolation distances keep the chance of possible seed contamination to a minimum. The idea is to try to keep that roaming honeybee from mixing the pollen of separate cultivars and the logical thought is distance. However, obstacles help too. A wooded creek, buildings, another crop, a strip of woods, anything to break up that straight shot between the varieties. If necessary, I use a raised bed behind my house to save another cultivar of seed in. You can also cage your plants with a fine wire mesh or micro-fine screen to keep out the roaming pollinators. These may then need to be hand pollinated, or insects such as houseflies (yes, flies) can be put in the cages to pollinate the plants. They feed on the nectar and will move the pollen around.
For wind pollinated vegetables, like corn or beets, which need a much greater isolation distance, one would do well to consider the prevailing winds. Is the neighbor’s corn going to carry its pollen to yours on that stiff southerly wind you get in your area? This is something to consider when trying to decide if you are going to go with the minimum or maximum isolation distance, (660 feet vs. 5 miles), or somewhere in between.
What about when you want to grow sweet corn, field corn, and popcorn? Well, it isn’t failproof, but there is a method you can do. My father did this all the years I was growing up and we never had much trouble with this method. As early as he dared, my father would plant his sweet corn knowing it wouldn’t be ready any too soon for him. After 2-3 weeks he would plant his field corn and then 2-3 weeks later he would do his 3rd variety of corn. Corn does not bloom continually like most vegetables; it has a relatively short window where pollination takes place and then it spends the rest of its annual life developing the ear. This is not fail-proof because you could have uneven growing conditions or other factors that delay or lengthen the pollination process throwing the timing off. It is only fair to say this though in my own experience I have not had trouble with it. Yet. However, I do try to avoid actually planting the staggered plantings of corn directly side by side. That is called tempting fate.
You also do not have to save seed every year if you save enough. You can grow all your peppers together but isolate a single cultivar every year to save the seed from, and then make sure you save several years’ worth of seed. Next year, another variety of pepper would then be singled out to be isolated to save seed from. Developing a long-term plan and schedule like this would be helpful.
Some of the easiest isolation distances to observe are those of beans and tomatoes. Of course, with every rule there is exceptions. Most beans and tomatoes only need about a 50-foot isolation distance. Tomatoes are essentially self-pollinating and all they really need is wind or something to disturb the plant to shake the pollen within the bloom causing it to pollinate itself. Most tomatoes have a closed bloom, having both male and female parts within the bloom. There are those who argue that a 50-foot isolation distance is unnecessary, but it doesn’t hurt. The exception to the standard tomato isolation distance is the potato leaf varieties such as Brandywine; they have an open bloom that is insect pollinated, causing them to join the ranks of those requiring a minimum isolation distance of 500 feet. Beans have their own exceptions; lima and runner beans also require the extra isolation distance.
Let’s talk about Genetic Diversity
Since it really doesn’t take much seed to maintain the home gardener it is a very easy mistake to save seed from only one tomato or one cantaloupe. Doing so year after year cuts the genetic diversity down sharply and over time the strain can become weaker and weaker. It is botanical inbreeding.
Preferably seed should be saved from 25-40 plants to give a good healthy genetic diversification. Some vegetables like broccoli need more than double that amount and corn needs at least 200. That is all well and good but in reality, most people are not going to be keeping 25 plants of, say, their favorite cherry tomato, where one or two plants is ample. There are a couple things to do in such a case. You often, though not always, get at least 25 seed in a packet. Plant your two cherry tomatoes from your packet, fold your packet and stick it in a repurposed peanut butter jar or something and stick it in the freezer. Go ahead and gather some seed from your cherry tomatoes and then store it in that peanut butter jar, but next year plant out of the packet again. When your packet is empty your jar will quite likely be full of enough seed to then last you probably the rest of your life (if stored in the freezer).
However, if the above idea is not practical for your situation, saving some seed is better that not saving seed at all. After several years you may want to consider adding some fresh seed to what you have.
You probably think that a Roma tomato is a Roma tomato. What genetic diversity is in that? Well, I grow and can all the tomato products I use outside the growing season. So, every year I grow in the neighborhood of 100 Roma tomatoes. In August, I am out there becoming personally acquainted with them as I pick them by the wheelbarrow load. I actually get to see some of the diversity between them. Sure, looking out over the sea of red among the green – they all look the same. But as I pick them, I notice each plant is slightly unique, some have fruit that is a little slimmer, another plant sports big beautiful Romas that hide a rather large hollow cavity in them, another plant is covered in oodles of just slightly smallish Romas. And then you have plenty of plants with your standard meaty Romas any of which may be hiding disease or pest resistance, or drought tolerance.
I have been using tomatoes as my example to illustrate some principles in genetic diversity, but it applies to anything you save seed from. My father used to try to pick his seed corn from stalks that had good anchor roots. These plants held up better in windstorms.
Seed and Disease
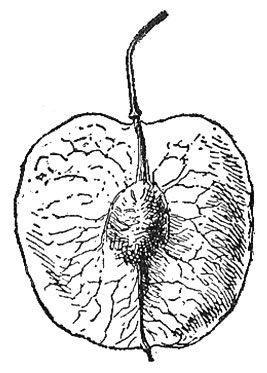
Do you ever see tomatoes and peppers with round rotten splotches? You likely have anthracnose, a fungal disease in your patch. There are ways of trying to control this, but you can also discourage it by not saving seed from infected fruit. This is one of a number of diseases that can spread by contaminated seed. Plants have STD’s too, Seed Transmitted Diseases.
It isn’t just fungal diseases that make their way around riding on seed kept from infected fruit. A bacterial disease known as Watermelon Fruit Blotch does too. I talk about this more in the watermelon section.
A profoundly serious viral disease that affects both tomato and tobacco crops is called Tobacco Mosaic Virus. Although it can pass through seed, that is not how it is usually transferred. This virus is so communicable that it can even be transmitted to your tomato plants simply by being exposed to someone smoking tobacco that was infected with the virus. Therefore, my father would not invite a smoker to tour his tomato greenhouse. It would completely devastate his crop if he happened to acquire the virus, and not only this year but several and maybe indefinitely. There are plenty of gardeners who smoke and have never had a problem, but commercial growers of any kind will try to be extra careful.
Cleaning and Drying Seed
There is wet process and dry processed seed. Dry processed seed is simply shelling those beans and winnowing away any chaff. Winnowing is pouring grain or beans or any other weighted seed from one bowl or bucket to another in the face of a breeze. The grain is heavier than the chaff. As you pour the grain slowly from one bowl to the next, holding one bowl a couple feet above the other as you pour, the wind will blow the chaff just enough to miss the bowl. That is what it is supposed to do anyway. Often, this will need repeated several times for the most success.
Wet process is combining the seed you scoop out of your vegetable, adding water and letting it ferment for a couple days to dissolve the outer coating some seeds have to protect them from sprouting prematurely inside the plant. When I was a kid, we had a semi-commercial strawberry patch. Among the zillions of berries I have picked, twice I have come across a strawberry whose seed did not have that coating and every seed on the beautifully ripened berry had sprouted. The strawberry had just matured, and so had the seed. Without the coating, the seeds had moisture, light, and heat, perfect for sprouting. It was actually a really interesting berry, but not commercially appealing, at least not our market.
Once 3-4 days go by, more water is added, and the mixture is stirred. The good seeds settle and anything that floats gets poured off. Be sure to give your mixture a few minutes to settle so you don’t lose your good seed too. More water is added and then anything floating gets poured off again. This is repeated until the seed looks quite clean. It is then poured over a screen and spread evenly to dry in a well-ventilated place. Stir it often to break up any clumps and to help it dry faster. If your seed dries too slowly it will sprout and be no good. Pick out any debris that may be in there as well.
Seed Storage
The seed you store must be dry or moisture can condense in your container and ruin your seed. It needs to then be put into an airtight container and stored in a cool dry place. The ideal place is actually in a freezer. Frozen, they can last for years, perhaps indefinitely.
When I was growing up an old man named Calvin Allen came to my dad and asked him to grow some corn for him. He had a half gallon jar of Tennessee Redcob (a white corn) that he’d had in the freezer for 30 years and he wanted some fresh seed to return to the freezer. Skeptical that it would grow well after that much time Dad planted it thick and then had to go back and thin the rows because every kernel grew. And boy did it grow! Two big ears on each stalk and deep kernels on every ear. Amazing corn. Dad refilled Calvin’s jar and sent it back but still grows that corn to this day himself.
There is no need to buy fancy containers to store the seed in. I use whatever I have, empty peanut butter jars, washed and dried are a favorite. But I also use empty pill bottles, baby food jars, spice bottles, just whatever I can lay my hands on. Always label and date your bottled seed.
Grow and Gather Seed
With as many different types of vegetables, there are nearly as many seed saving techniques and methods. Each are tailored to the need of the plant. I’ll go through some of the basics of my garden essentials and what I do. In plant families there are many species, for a comprehensive guide check out Suzanne Ashworth’s book, Seed to Seed.
Beans
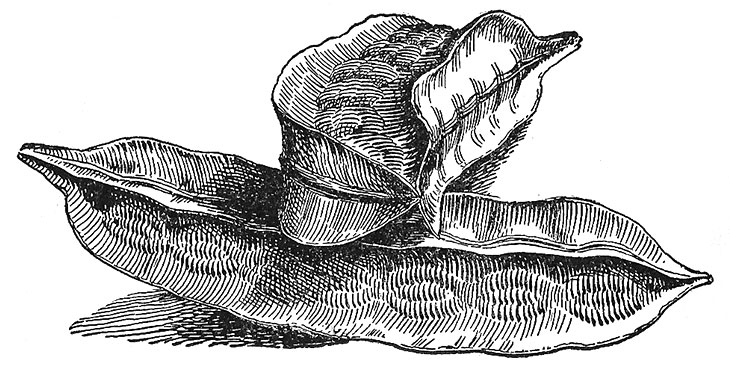
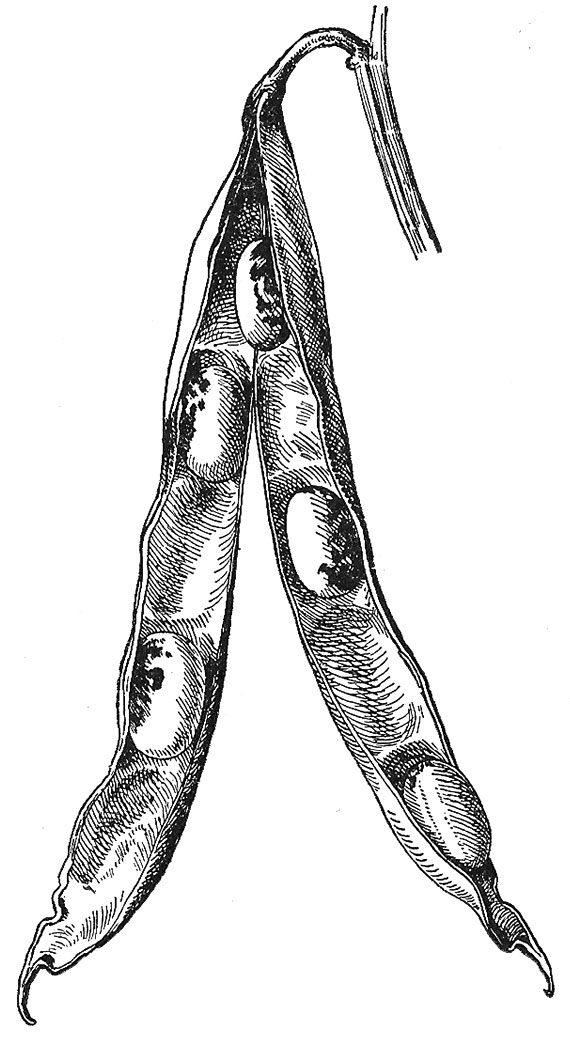
Common beans (P. vulgaris) such as green beans, and many shelling beans require a minimal isolation distance of only about 50 feet because they are self-pollinating. Many probably don’t even need that much space but I have not had any trouble accommodating this. Some beans, like runner beans (P. coccineus) and lima beans (P. lunatus), are self-pollinating, only they can be insect pollinated as well so they require an isolation distance of a half mile, or at least 500 feet.
Beans are about as easy as it comes to seed saving. Simply let the plant mature and the seeds ripen (dry) on the plant. Some beans, like pinto’s will “shatter” if left on the plant too long. When a seed shatters it means that the pod, once dry enough will burst, either dropping or flinging the seed to self-seed itself. Let these go as long as you dare and then gather them in the morning when the dew is on because they will not shatter when slightly moist.
Khoke and I grow lots of pintos because they are a staple at our house. The pintos are gathered with the dew on and then spread out on a swept concrete pad to fully dry. Then we tread them by walking on them to fully force the shatter. Beans are heavier than the chaff and will find their way to the bottom and then we rake off the plant matter. From there we sift the beans through a couple screens to separate them from the chaff. The first screen allows the beans to fall through and the larger chaff that remains is dumped in a pile to the side. The beans are then sifted through a screen with wire small enough the beans cannot go through, This gets rid of the small debris. Now you are left with all the pinto bean sized pieces which may take some hand sorting. The screens we use are just different sizes of hardware cloth attached to a wooden frame that is about a 3 by 5 feet rectangle and maybe 6 inches deep. It takes two people to shake it.
Most green beans will not shatter. I pick them and house them until I have time to hand shell them. They are prone to molding if left on the plant too long after they have fully matured. Wet weather will make this worse.
My line fence neighbor in Tennessee, Loman Bailey, always said his garden was his fishing pole. Beans were one of his favorite vegetables to grow and eat. Traveling through Mississippi once, he stopped by a roadside stand and bought a “mess of beans”. Once home, he shelled and cooked them. He liked them so well he went back down to Mississippi and found that stand again and asked the grower for some seed. The farmer refused to share the seed, it was a family heirloom and he guarded it to make a profit from at his stand. Loman knew it was much too far for him to travel for beans on any sort of regular basis. So, he sorted through the beans for sale and picked out the most mature ones available. Then he took them home and let them finish maturing in their shells until they were dry and then planted them the next year. They had developed enough that they could finish maturing in the pod but off the plant.
Cabbage and other biannual Brassicas.
A lot of brassicas are biennial and are a little tricky to save seed from. They will grow and fruit this year and seed next year. The problem with this where I live is it gets too cold to overwinter them here. For this I have not put forth the effort to save their seed yet, but my neighbor gave me very practical solution that I am going to try. He said to dig a trench deep and wide enough to transplant full sized cabbage plants (or another biennial brassica such as turnips) and have the tops just below ground level. Take boards and cover the trench with the cabbages planted in it and then cover the boards heavily with straw to over winter. In the spring simply uncover the plants and let them grow and bloom where they are. You can pull the edges of the trench back a little to open it up to let in a little more light.
In the age of root cellaring, people would often dig up their cabbages and put them in the cellar over winter, not just for winter food storage but also the next years’ seed crop. In the spring they would be replanted in the garden. Of course, they would look a little blanched and sad, but then, you would too if you had to sit in a dungeon for a few months. Even if it was for your own good. Just plant them out in the spring after the hard freezes are past.
Brassicas are in the insect pollinated category and want that half mile isolation distance. The bummer is, that isn’t just about keeping your cabbage varieties separate but keeping your cabbages from your blooming broccoli, or cauliflower or any other brassica. The good news is, you can grow all the biannual brassicas you want together this year; it is just where you transplant them after overwintering next year that matters.
You can also harvest your cabbage head and it will make mini heads that look like a larger and looser brussels sprout and live on. What I am trying to say is, you can harvest your cabbage head and then still overwinter it and have it seed next year. When it seeds it will send up a flower stalk that blooms and sets seed. Pay attention to your brassica as it matures so that the seed doesn’t get lost by it reseeding itself.
So what happens when they cross pollinate? Well sometimes it is a disaster creating a non-vegetable and sometimes it makes a whole new vegetable. Supposedly rutabagas are a cross between a wild cabbage and a turnip. I would have guessed that is what happened to make kohlrabi, even its German name suggests it, but it is not a cross between cabbage and turnip, it evolved independently.
Corn
As a wind pollinated plant, corn needs a generous isolation distance, the USDA says 660 feet is sufficient, Suzanne Ashworth suggests 2 miles, and some seed companies want no less than 5 miles to ensure genetic purity. As I said there are a number of factors that can influence whether to go with the minimum or max; as I mentioned in the section discussing isolation distances, corn was an example I used.
Corn is best left on the plant until the entire plant is dead. Sometime after frost, gather your corn seed. Walk through your rows looking not only for large ears but for sturdy plants. Do this before you harvest your field. If a windstorm flattened part of your patch, try to save seed from ears on plants that remained standing. You want the genetics that gave them the strength to stand up to the wind. My dad would always look for stalks that had anchor roots, these didn’t tip as easily.
As you gather your seed, get plenty. Several years’ worth. You don’t have to keep every kernel off the ears your keep either. About 20 full ears will plant an acre. If your corn needs to dry more, pull the husk back (but not off) and tie the ears in bundles of 3 or 4 and hang them up to dry. Shell them at your convenience but not so long as to have bugs or mice get to them.

Cucumbers
Cucumbers fall into that insect pollinated section, so I tend to just grow one variety. Since I make pickles, I grow a pickling variety and they taste just as cucumber as a slicer, so I grow enough to accommodate for both fresh eating and canning. Now I am not personally a fresh cucumber eater, I am relying on my husband’s satisfaction with eating pickling cucumbers fresh, so there may be those with more discerning tastes who disagree.
Saving cucumber seed is neither easy nor hard. It just depends on your definition. I pick two or three good pickings and then leave the rest for fresh eating and seed. I always have a few cukes that I missed and are too large at my next picking. By my 2nd or 3rd picking I just leave these go for seed. They will stay on and fully mature. I pick nice straight fully filled out cucumbers, they should be quite yellow with the flesh and skin becoming soft, and the seeds mature when you pick them for seed. If picked too early, you will have a lot of immature seeds and maybe poor germination.
Anyway, when my seed cucumbers are ready, I slice them open, scoop out the seeds into a container. I add a little water to this and let it “rot” for 3 or 4 days. It is good to stir it a couple times. This is to deteriorate the chemical coating on the cucumber seed that prevents it from sprouting in the cucumber. After a few days I double the liquid volume in the cucumber seed container with water. I let it settle and pour off anything that floats. Floating seeds are usually immature. Then I add more water, stir briskly, let it settle and pour it off again. I repeat this over and over until the seed is clean. You may lose a few good seed in this process, but you will have much more than you need with plenty to spare. Once they are washed fairly clean, pour the seeds and water through a sieve or screen. I like to use window screen. Then I spread the seed out over the screen and let it dry. Once dry it needs packaged and labeled well. Cucumber seeds look the same as cantaloupe seed and it is disappointing on either end when they get confused.
Garlic
Now there is technically two ways that garlic makes seed. Really the best way is by planting the cloves. Pick out the largest and best cloves and plant those. Garlic also sends up “scapes” (the edible blooming stalk of garlic) during its growing season. It shoots up a stalk that blooms and sets seed that look like tiny onion sets. The stalk and bloom are a delightful early summer addition to your savory seasonings. It has a pleasant mild garlic flavor. They are usually removed so more energy can go into the bulb. If they are left on and set seed, it dramatically reduces the size of your garlic bulb. This is why they are removed from the plant as soon as possible.
However, if you missed a few and wind up with actual garlic seed they can be planted. Do not freeze this seed in your freezer like you do other seed. Garlic seed can be planted in the fall as you do your regular garlic cloves. Plant them about an inch deep and 3 inches apart. These will make a one clove bulb. If this one clove wonder then is planted it will make a regular bulb with multiple cloves the following year.
Sometimes I have a few scapes escape me and a late bloomer sets seed that I don’t need. I pop off the top and take them to a fence row and scatter them there. They will naturalize themselves if given the chance and I have no grudge against that.
Due to moving from one place to another I lost my garlic seed stock (cloves) once. Unable to afford new to replace it, I went back to the old farmstead in July and pulled up a bunch that I had once scattered and had naturalized. This, having gone wild, was quite small but easily coaxed back to a good size after a couple years with good soil and care.
Greens
Most greens are insect pollinated and require a substantial isolation distance between cultivars. Except for lettuce which takes only a 25-50 feet or so from another lettuce cultivar. Very forgiving, much to my delight because I like growing multiple varieties. You can grow lettuce and arugula side by side and not have to worry about cross pollination between them.
Greens is a very general term. A lot of them are actually brassicas, like kale, mustard, turnip and even arugula. Having these cross with each other is usually quite undesirable.
The surprising greens to me are beets, spinach and swiss chard. They, like corn, are wind pollinated and require the isolation distances of a 660 foot minimum and a 2-5 mile maximum. Those who live in areas where they raise the big fields of sugar beets would have to consider proximity to one of these fields. Interestingly, beets and swiss chard can cross. They are both biennials in the beta vulgaris group.
Most greens “bolt” or shoot up a stalk that blooms and sets seed. Lettuce, mustard and spinach are annuals and will bloom the same season they grow in. When my lettuce bed begins to bolt, I take my hoe and cut out the first ones to do so and save seed from the late bloomers. This helps ensure that the lettuce I grow will continue to (hopefully) bolt later and later developing better heat resistance and giving me a longer season.
When the seed is mature but hasn’t shattered out yet, cut the plant at ground level and put it topside down in a brown paper bag. Let it dry in the bag the rest of the way and then shake the tops in the bag to dislodge the seed. It is good to cut your seed stalks in the morning if they are pretty dry, the dew can help keep the plant from getting too excited about dropping all its seed on the ground. The little bit of moisture helps prevent shattering.
Not that a little self-seeding is all bad. I let some of mine do just that. Lettuce will only sprout in the ground when the soil is a favorable temperature. So I keep my eye on the garden in the spring where I had my lettuce beds the previous year. When the soil temperature rises high enough, little baby lettuce plants emerge. This is usually around the time we are ready to get our ground ready for planting out our early frost tolerant garden. Since the ground is about to be worked, I go out and dig up a bunch of volunteer lettuce and transplant them into rows. I have had lettuce do this in the fall as well. When the soil is too warm, they don’t want to poke their heat sensitive little noses out of the ground either. When the soil cools in the fall enough to be in their comfort zone, they can sprout and show themselves then as well.
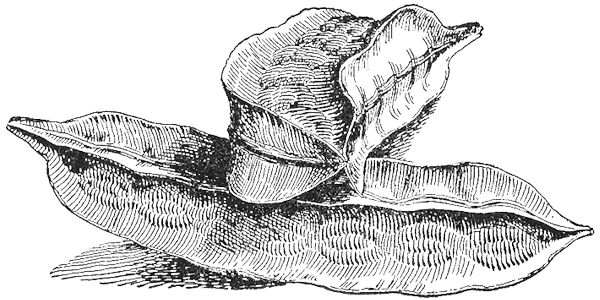
Gourds
Calling them gourds is a little bit of an over generalization. There are lots of different kinds of gourds. Of course. But I am talking about several different genera. The ones we are most familiar with are the day blooming Cucurbita which are basically an inedible squash that we commonly call gourds. Another is the beautiful night blooming Lagenaria gourds such as the bird house gourds that are pollinated by the Sphynx moth, an adult tomato hornworm. And don’t forget the Luffa gourds, another cousin. However only gourds of the same species will cross. Keep in mind those Cucurbita gourds may be able to cross with some squash in the same species. Which would be annoying.
Once you sort out who needs isolated from who, saving gourd seed is delightfully easy. They are picked when very mature and either gathered from the gourds after they have fully dried or open them, remove the seed and let them dry on a screen.
Melons
The melons I am referring to are cantaloupes, muskmelons, and honeydew and all their close kin. The above will all cross pollinate. Sadly. There is no such thing as too many melons. Or different kinds of melons.
At least these melons are easy to save seed from. Just don’t fall into the temptation of saving seed from only one melon because they are very generous with how many seed they are willing to share. It would give you plenty of seed but not genetic diversity. Instead, every time you open one of these beauties, take out a teaspoonful of seed to save. Then scrape the rest in your compost bucket. Rinse the seed you are keeping in some water and dry on a napkin, paper towel, dish towel or old window screen. Be sure to label and date it when you bottle them.
Okra
Sure, okra asks for up to a mile of isolation distance, but then I only grow one kind anyway. As I pick them, I have the occasional one that I miss. I just leave it go and let it set seed. Then towards the end of the growing season when I am tired of eating them anyway, I let what is left on the plants mature (harden and dry but before they shatter). Right before frost I take my clippers and clip off however many dry pods as I want. I take the pods in my house to shell out the seed at my leisure. Whatever that word means anyway.
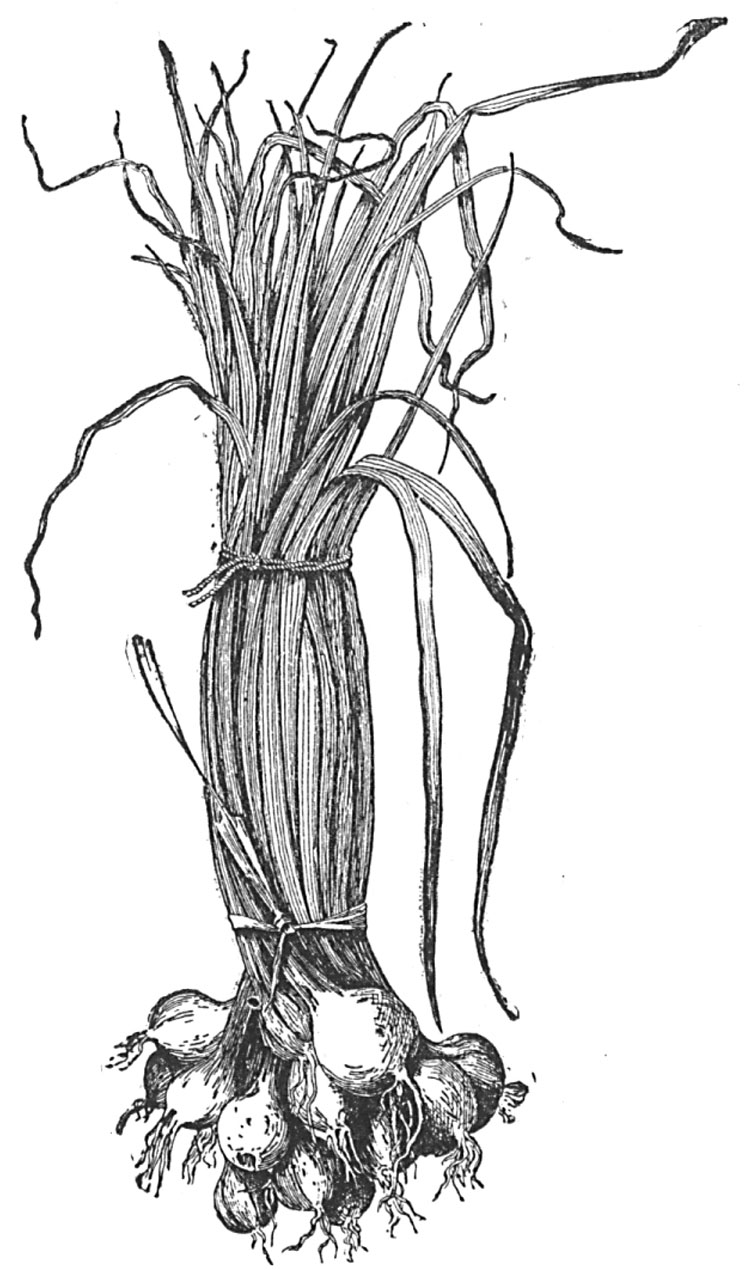
Onion
Onions are biennial. Typically, onions stored over winter are planted in the spring and those shoot up a stalk that makes a white pompom bloom which in turn will set seed. Cut off the seed heads and let them finish drying in a paper bag, then shake the bag to dislodge the seed. These seed will then be saved to plant the following February in trays.
Something I am going to try this fall however, is planting some onions in the ground at the same time and same way as I do my garlic. When I pull my onions I usually miss a few small ones that seem to not only survive being plowed but also survive our southern Iowa winter, and then go on to bloom in the spring. This is coupled with the fact that not all the onions I like to grow are good storage onions and I have a hard time keeping them through the winter in my house. But somehow, they manage to survive out in the ground facing the abuse of a northern winter. So I am going to let the onions I want try to overwinter on purpose.
Peas
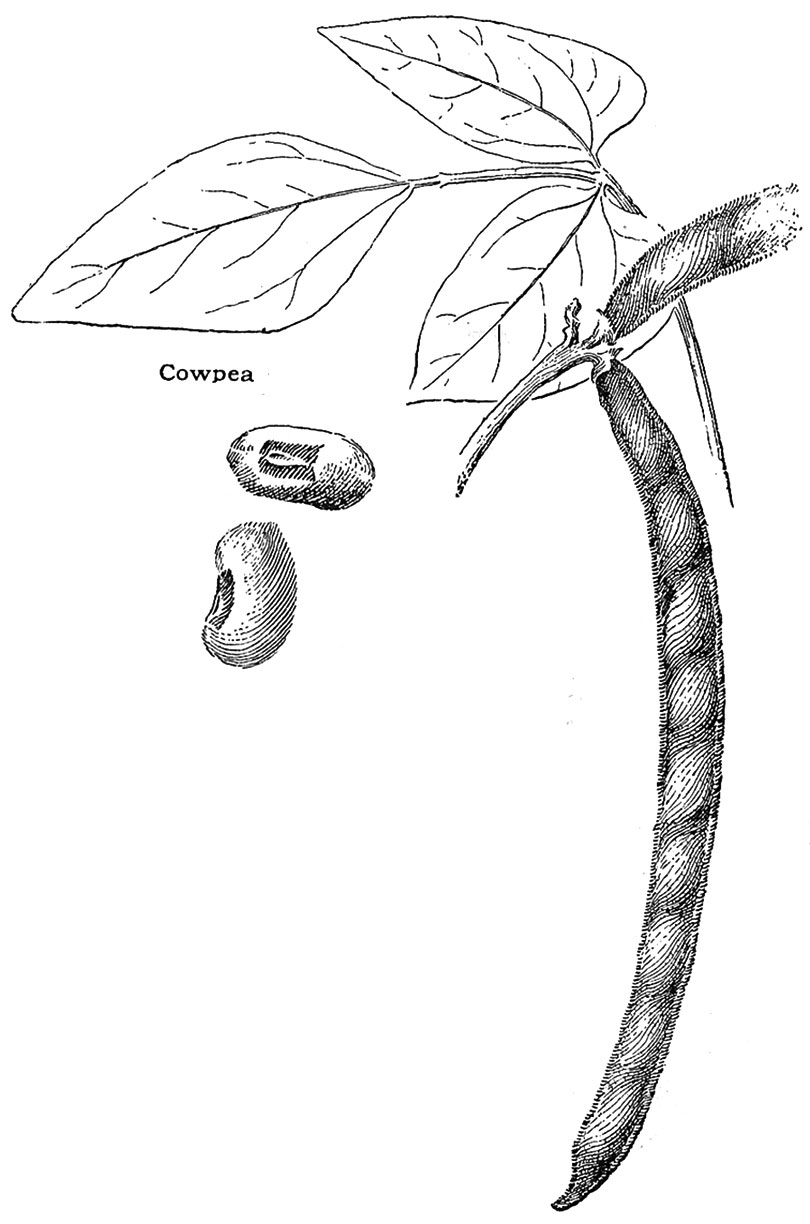
English peas, as I heard them called in the South, differentiated them from Cowpeas, which taste more like a bean (personal opinion), and sweet peas, which actually are a toxic ornamental.
English peas, however, can include snow peas, sugar peas and shelling peas. All of whom will cross with each other. At least they don’t have much of an isolation distance, a maximum of 50 feet. They will not cross with cowpeas which are something else entirely. Simply allow the peas to mature on the plant and then once they have dried fully, pick and shell them.
Peppers
It is wonderful to save seed from peppers from one year to the next and not have the bell peppers confess some unwanted heat borrowed from the cayenne also planted last year. Peppers are kinda sorta self-pollinating, but insects are more than capable of cross pollinating them. So a 500 foot isolation distance is recommended between varieties.
Pick unblemished peppers from disease free plants. They need to be fully ripe, whatever color that is besides green. I usually just split the peppers and scrape out some seed onto a screen and let them dry. Thin-walled peppers can be strung and dried to collect seed as you use them.
A reminder to all those who have not learned this the hard way, like me, when processing very hot peppers please save yourself some punishment and wear gloves. Cutting and handling very hot peppers, especially fresh ones can burn your skin with their oil. And it doesn’t just remedy itself quickly. I have had bright red hands that burned for hours, even after I tried every remedy I could think of. Just wear the gloves.
Peppers can also be put in a blender with a cup or two of water. Blend on low. Don’t overdo it. You want to grind the peppers to pulp but you don’t want to make a pepper seed puree. Allow the seeds to settle to the bottom and pour off what floats on the top. Add more water to float more pulp that you will pour off. Repeat until the seed are relatively clean. Then pour over a screen and let them dry there. Once dry, bottle, label and date them.
Radishes
One of the earliest spring vegetables, radishes take just shy of 4 weeks to begin to harvest. Once they get woody and pass the edible tuber stage, they shoot up a tall flower spike with small daisy like flowers that set dozens of pods. These pods, when they are yet immature can be eaten with just as much satisfaction as its roots and taste very similar.
These pods become woody as well, hardening to a shell that will eventually burst and shatter out the seed. Once the pods are mature, cut the stem and put the tops in a brown paper bag to allow them to fully dry out. Once dry, shake them in the bag to dislodge the seed. Pour the seed out of the bag, separate out the chaff and then bottle them.
Make note that radishes are a brassica and can cross with something like cabbage. Radishes though will seed this year and cabbage will seed next year.

Squash/Pumpkins
Squash is one of those vegetables with a big family. Some of its members will cross-pollinate and some will not. Generally speaking, summer squash like zucchini’s, and crookneck do not cross pollinate with winter squash like butternuts. There are exceptions to this like Acorn or Delicatas can cross with summer squash.
Pumpkins are really an overgrown watered-down squash that is more than happy to cross-pollinate with a butternut or any other better tasting winter squash. The opposite is true too, don’t let the squash you planted in the garden compromise the giant pumpkin you grew and want to save seed from. When growing multiple varieties of squash is best to check on what crosses with what if you are going to try to keep seed from them. They need about a half mile isolation distance from each other.
The good news is, it isn’t super hard to hand pollinate these. You have male and female bloom on all your squash. The female bloom has a miniature squash or pumpkin right behind the bloom and the male does not. Beat the pollinators by pinching unopened male and female flowers closed with a clothes pin before they open, you can also tie or tape them shut. Be careful not to damage the flower. In the morning open the flowers and dip a Q-tip in the male flower and rub a little pollen off the stamen and transfer it to the stigma in the female flower. You can rub the stigma with pollen from multiple stamens. Do not use pollen from male flowers that opened on their own, they may be contaminated with foreign pollen from insects. Once pollinated, you will want to reclose the female flower so insects don’t bring in unwanted pollen.
Keeping their seed is relatively straight forward. Let the squash fully mature, that means your summer squash will have to develop to its full potential size and get a hard rind on it. When you cut them open and expose the seed cavity, scoop some seed out and wash them and then let them dry.
Once upon a time, I rescued an orphaned baby squirrel. He was wonderful. Mostly. I had saved a bunch of squash seed and had them spread out to dry on a newspaper on top of my china cupboard. He found them. Yeah, he liked them.
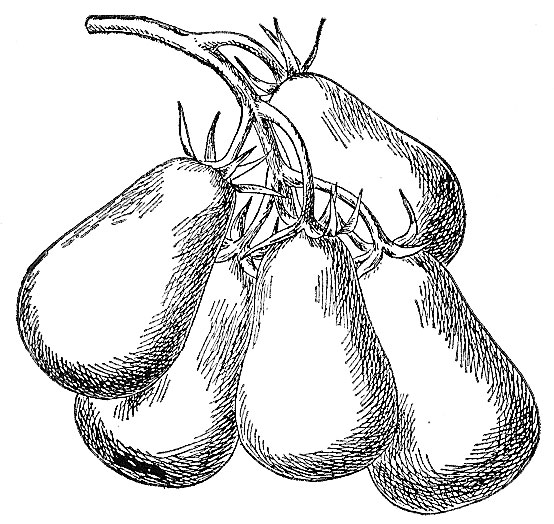
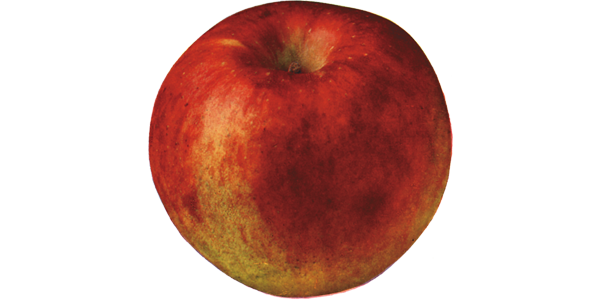
Tomato
Tomatoes are self-pollinating with the exception of the potato leaf varieties. Tomato isolation distances were covered pretty well in the examples I used while discussing isolation distances.
I will describe how I process my tomato seed, but really you can just squish some seed on a napkin and save it, just do it from multiple tomatoes. There is nothing wrong with doing it this way.
My favorite time to collect tomato seed is when I am canning them. Before they are cooked of course. One year I had a particularly beautiful crop of Romas, as I was working my way through processing a wheelbarrow load of them, I decided it was advantageous to get ahead on my seed. Picking out the nicest tomatoes I would slice them and squeeze out the juice and seeds until I had an impressive amount in a small bucket. Water was added and it was left to sit about 3-4 days until it got a nice film of mold on top. Then I began cleaning them.
Fermenting them briefly will dissolve the chemical coating the seed naturally has to keep it from sprouting inside the tomato. Many plants have this with their seed. The decomposition of the fruit or even being in the ground would do this too. But to get that beautiful white seed in a packet, this is how it is done.
Back to cleaning. I added more water to my aromatic fermented tomato soup and put a lid on it and shook it. Then I gave it a few minutes to let the seed settle and poured off the pulp that floated to the top. Then I added more water, stirred it well, let the seed settle a minute or 10 and then poured it off again. This I repeated over and over until it was cleaned to my satisfaction. Then I poured the rest through an old window screen and spread the seed out to dry on it.
As you are washing your seed, you will lose some good seed that gets caught with the pulp and pour out with it. This is not a big deal; you will have plenty of seed. I have nearly a quart of seed I saved from that picking. This translates to, with the amount of seed I use every year, I may have some of this left when I have grandchildren. Since I have no kids yet, that would be a while.
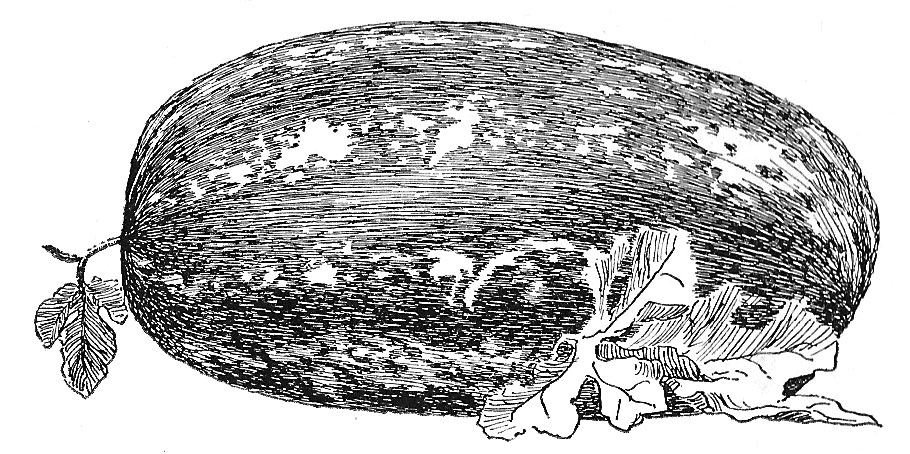
Watermelon
The best comes last. My all-time favorite seed saving experience. The better the melon, the more seed I save from it. Remember to keep seed from more than one melon, the more melons, the better. Rinse your seed in clean water with just a dab of dish soap, this helps them from being sticky when they dry.
Watermelons, of course, join the ranks of insect pollinated plants and a half mile isolation distance is what is asked for. If you save a large volume of seed one year, several years’ worth of your favorite seed can be saved and frozen. Then you do not have to save seed every year. That means next year you can grow your favorite variety while trialing a couple new ones.
A word of caution and perhaps incentive, there is a watermelon disease called Watermelon Fruit Blotch. A bad nasty pain in the neck. And it passes through seed. Sure, seed companies test for it, but they cannot guarantee 100% disease free seed. There can be trace amounts of the bacterium small enough to escape detection but with ideal conditions can grow into a classic nuisance in the garden. It shouldn’t be too hard to deal with in a small garden because you should be able to control the spread by making sure that no seed overwinters in the ground, or you may have it again next year. It is particularly devastating to large commercial producers resulting in heavy spraying or crop failure when the disease pops up. For this reason, I am reluctant to buy more watermelon seed than I have to, and I have taken to only growing my own watermelon seed.
You can do it!
Saving seed, once an essential skill, has faded in the face of beautiful catalogs with hundreds of varieties beyond what you have already tried. Who wants to keep the same seed when they want to try something new every year? When you find something that works well though, for you or your soil or climate, stick with it. You can still try something new every year but keep what you know works for you too.
Once you begin seed saving, you realize most of it is quite easy and natural. For successful seed saving you just have to commit to observing some basic guidelines. For me, the hardest part of seed saving is not actually saving the seed. It is remembering to do it. Much of it is done during my busiest time of the year. I need to gather my bean seed, sure, but right then I am busy canning tomatoes and I get to the beans belatedly.
Start off with the easiest things to save seed from, okra, winter squash, beans and melons. Add a new seed to save every year. Every seed saved and replanted continues the legacy of gardeners who have preceded us and preserves it for the gardeners that will continue on beyond us.