
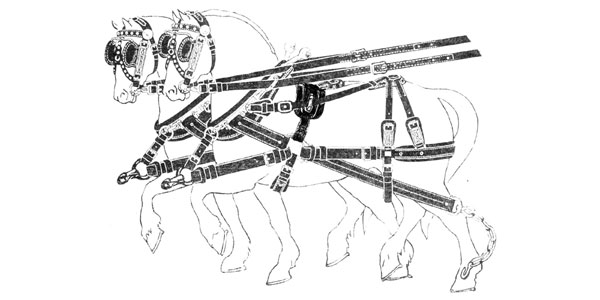

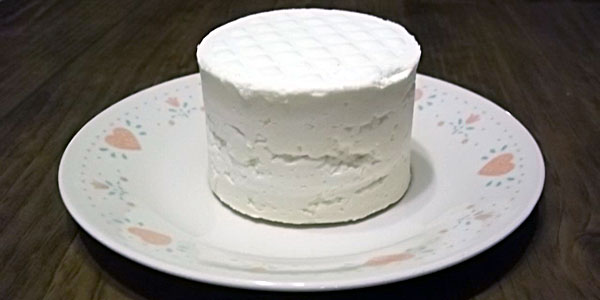

Homemade Cheese Press
by Ken Gies of Fort Plain, NY
On the Gies farmstead we occasionally wallow in goat milk. From it we make our own butter, yogurt and cheese as well as drink some. This has prompted me to build a little cheese press to help with the extra milk. But before I describe the cheese press, here is a quick overview of how most of our cheese is made.
We usually make raw cheeses. It is aged in a dedicated apartment sized refrigerator, which we keep set at the warmest setting. Our process is to use the morning milk, which is strained and inoculated with 2 drops of vegetable rennet per pint, stirred and set on top of the big fridge overnight. We do not heat it at all. In the morning it is curded up. After I finish the outside chores, I strain the curds and whey through a piece of muslin cloth suspended by clothespins over the rim of a large pot. After a few hours of draining, the curds are placed in the press and squeezed overnight. Several times through the day, we tighten the wingnuts to keep the spring pressure high. This makes a hard, dry cheese, which I prefer.

We have tinkered with clabbered milk as well. This a more time consuming process. It is very simple though. Warm milk is set in a warm place in a jar or stainless pot and left covered for three to seven days, until it forms natural curds. Then it is strained and pressed. It makes a sour cheese and although we have tried different culture additives, we have not been really thrilled with the results. So, we just use the rennet method and make a mild cheese. I should add that we have successfully made raw cheese from whole milk, skim milk, buttermilk, soured and sweet milks and mixes of them all. In reality we just throw in what we have extra and go. Buttermilk cheese is very strong and will peel your eyes open faster than a banshee bellow from Boswell Adroit himself.*

The press is made from inexpensive 1/2 inch thick plastic cutting boards used for the top and bottom plates and pressure disks, white pvc pipe, and a plastic floor drain cap. Hardware includes some threaded rod and nuts, washers and wingnuts, one 5/16 inch by 3 inch carriage bolt and a 1/2 inch pipe flange with a 1/2 by 3/8 inch reducer and a 2 inch long 3/8 inch pipe nipple. The last piece is a 1 inch diameter by 2 1/2 inch long spring. I used 5/16 threaded rod cut to 10 inches, since the piece I bought was 30 inches. One foot pieces would be a better length. My first press tube was made from 4 inch pipe and was 7 inches long. My second one, used for smaller batches, is a 3 inch pipe cut to 6 inches long.

The bottom insert is made by trimming a floor drain to fit into the tube. There must be just enough clearance for a snug fit with one layer of muslin laid over the drain piece. I used a hand file so that I would not trim too fast. It is a “file a bit and try it” type of operation. It took at least 30 minutes to get a snug fit with the muslin inserted over the drain cap in the pipe. This allows whey to pass through but not the curds.

The upper inserts are cut from the cutting board plastic using a band saw, or if you have the right size, a hole saw. I made the disks about a 1/16 inch smaller in diameter than the inside diameter of the tube. However, one disk must be cut a little larger so it can be fitted with a layer of muslin as a packing for the disk. I carefully filed the edge of the plastic to get a good fit with the cloth. Otherwise curds ooze up and out when pressure is applied. The extra disks are stacked in the tube as spacers when the cheese is shorter in the tube.

The end plates are 7 inches on each side. They could be as little as 6 inches with room to spare for the rods. On the bottom plate the rods are mounted in an equilateral triangle with 4 1/2 inches between each hole and held with washers and nuts on both sides of the plate. This allows room for the nuts that mount the rods to the plate to clear the 4 inch pipe when set in between them. The upper plate has the carriage bolt mounted in the center of the three rod holes as a guide for the spring which presses on the flange and disks. The pipe flange is assembled with the reducer and the pipe nipple as a piston. The spring sits loosely over the nipple.

Assembly involves inserting the muslin covered drain into the bottom of the press tube. This is set on the bottom plate between the threaded rods. This in turn is set into a shallow pan to catch the whey. Then the cheese curds are placed into the tube and the one special snug disk with its muslin cloth is inserted into the tube against the top of the cheese. Extra disks are stacked to fill the tube and the flange and spring set on top of it all. Then the top plate is slid over the rods with the carriage bolt sliding inside the flange nipple and spring. This helps guide the spring. Then washers and wing-nuts are screwed on the rods. Don’t tighten the press too tight at the start. Gradual pressing seems to get more whey out.

We have learned a couple of tricks for using this press. The first is already mentioned, press gradually.
Second, when removing the cheese, use a pusher since it is usually very snug in the tube. After ejecting the cheese remove the top disk and the drain from the muslins. Finally, gently peel the muslin free from the cheese just like removing a bandage. This will reduce tearing parts of the cheese off.

We have had widely varying results with our cheese making adventure. Each batch is different. This is actually a good thing to me, it adds variety! But I really can’t leave you without a few thoughts on storage and eating. We have tried using cheese wax with excellent results. But I always try to find ways to limit the purchase of ingredients. That is why I tried clabbered milk last summer. Brining has been good too. The cheese is salty, but it is easier than waxing. Often we just let the cheese harden a rind and eat it before it is a month old. Our big fridge dried the cheese out very quickly. Our little fridge is much slower at shriveling our cheeses probably because it runs at a warmer temperature. Leaving them at room temperature has not proven effective for us since the cheeses get moldy in just a few days and taste like it too. It is not recommended.

We eat our raw cheeses sliced, fried (kind of antithetical, but hey!) dehydrated as a powdered topping, and sometimes unpressed as a cheese spread. We add dried onions and herbs to some of our hard cheeses and many times to our spreads. It makes a great snack when scooped up on dried tomato slices. We don’t share any of our raw milk products. Many people are not accustomed to live food and it doesn’t sit well with them. That suits me just fine since I am a bit selfish anyway. It simply means more for me!
